I can work on your project.

Find me! Call DAP at 214.350.7678 or email rene@dallasaudiopost.com. Also check out echocollectivefx.com for custom sfx, and tonebenders.net for my podcast.

Sunday, June 26

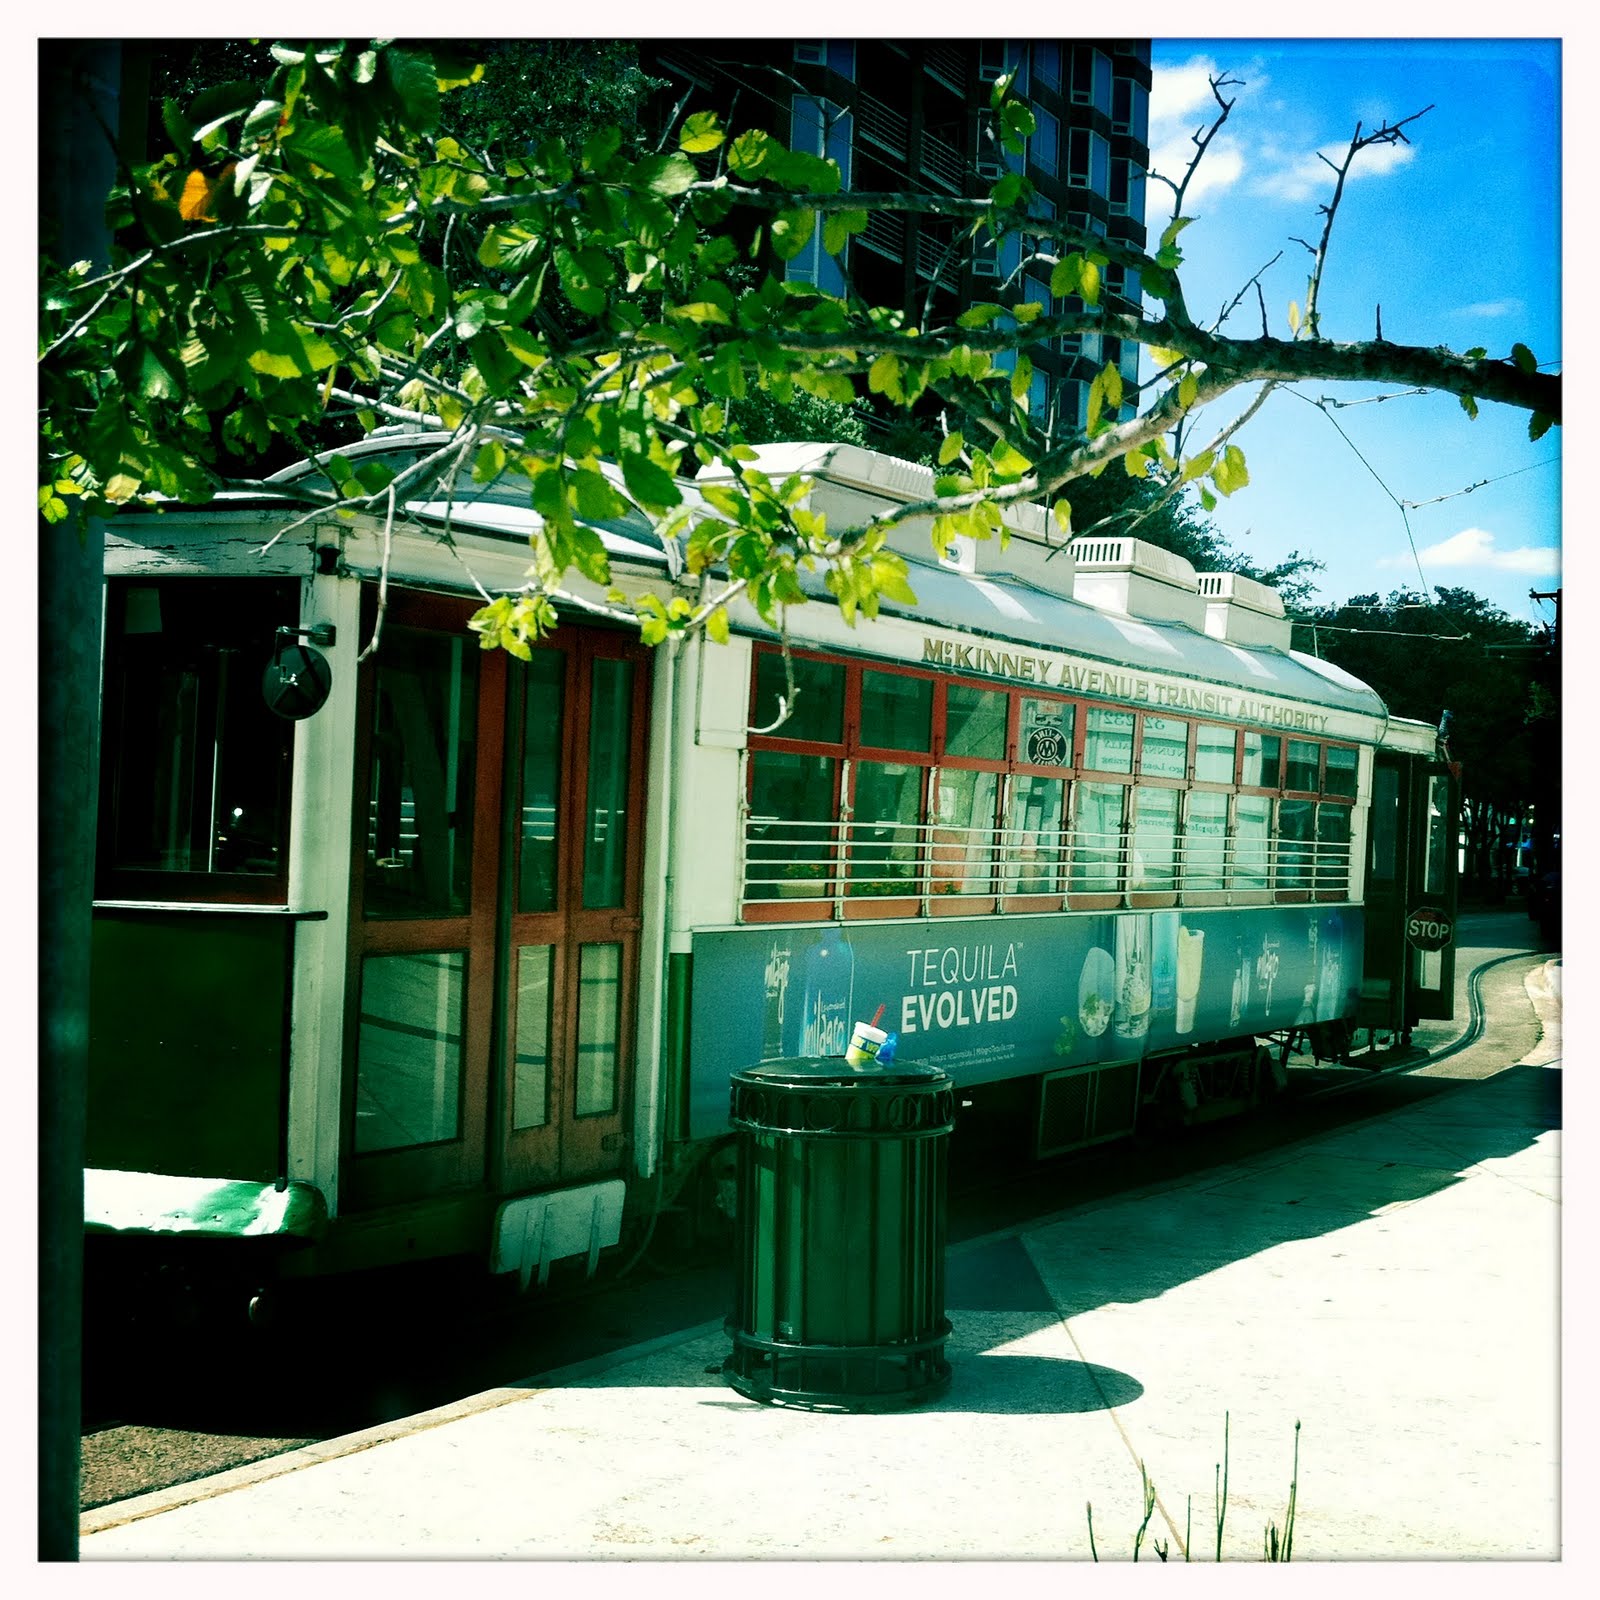
uptown trolley


Yesterday I ventured out to uptown to record a trolley for The Sound Collector's club. The trolley I was after was one of the restored mckinney ave trolleys, and I found pretty much what I was after.

The trolley is free to ride and makes its entire circuit in about 40 minutes. when I got onboard the conductor said "hello" to everyone, and then rolled us down the rails. He had a footpedal that would ring the bell before he took off from a stop, and the trolley had pretty nice sounding airbrakes as well. The door opened in a classical bus/trolley lever move and had a nice old sounding squeak to it.

Because I picked a sunday afternoon to do my recording I ended up on a pretty busy trolley, with lots of people getting on and off at every stop. I never had a stop on the entire circuit that didn't have kids on it.

At the end of the tracks near cityplace we all changed our (ancient creaky wooden seats) over to the opposite direction by moving the back to the other side on a hinge, resulting in us sitting in the same seats but facing the opposite direction.

That trolley is a thoroughly interesting sounding car because of just how creaky and squeaky it all is, and I really need to charter the thing to get a proper recording done. All in all it was good fun though, and is a treasure sitting right there in my own backyard.

Thursday, June 9

west texas gun recording pt 3-post and lessons learned

In part 1 of this series I talked about prepro and prep for our little gun shoot. Part 2 went through the craziness that happened on the day of the shoot. Now lets get into the post process and lessons learned.

Post on these sounds was actually pretty straightforward.

In a 24bit 96k session I opened all of the files, named them according to my voice slates, and then lined them up in time. It should be noted here that I did not align them hyper-exactly, as I wanted the explosions to spread out a bit and take up some space.

With everything lined up I started soloing out tracks and setting up signal chains per.

Things that surprised me:

- 421 gave me very little. I hadn't recorded guns with that mic before, but didn't get as much punch as I was hoping for.

- Schoeps CMC6 was hitting the limiter a little too hard even with the pre all the way down, which was ruining the moments after the attack. I'm confident I can get a way better recording out of this mic than I did that day.

- AT4050s were amazing. I had a good feeling about what I would get from those mics, but I was really blown away by how much low end and transient response made it out to that position. Having them 100 yards up range was still barely far enough away. Putting them in omni was absolutely the right decision.

-some of the ricochets were amazing. The guys shot down a tree during the process, and some of the shrapnel and debris was really pretty sweet.

- I discovered that my H4n wasn't set to the internal mics on the day, so that's another set of mics I didn't have going.

Things that didn't surprise me:

-416 sounded great

-COS11 was amazing

-NT5 gave me something worthwhile

-with me running all of these mics and having to monitor everything on a one hour timeframe I ended up missing some technical details in the field

--------------

Signal chains on each channel reflected my initial concept of miking for punch, mech, and verb.

Punch mics went through the H-comp and got thier heads lopped off.

Mech mics went through a little low end rolloff and a less sever H comp

verb mics went through a c4 set to multiband expansion with a superfast attack and a very slow release that coincided with the decay

Mono mics were all panned slightly off center in order to clear up room there.

Everything summed through another H comp set to give me a little analog feel and some punch, and an L2007 limiter.

Settings were tweaked per gun and printed, but plugs were generally not swapped out or anything.

I output 4 layers per gun - Full mix, distant, mech, and foley

Here's a little sample of what I came up with:

West texas guns by Rcoronado

and here's what my final output and metadata ended up looking like:

----------------

So here's a quick list of things I'd do differently:

1) have more time
the time crunch before sunset really put a damper on my ability to test and react to technical issues. I didn't feel free to fix my NT5 that wasn't giving me signal, I ran the H4n and didn't record anything on it, and I have to attribute some of my results with the AT4050s to pure dumb luck because I wasn't able to monitor them as we were shooting.

2) have more help
Even though there were four of us on the shoot, I was the only one not firing and loading weapons. This meant I was responsible for setting up, monitoring, and troubleshooting every channel which added to my time pressures and forced mistakes I didn't have to make.

3) pad that Schoeps CMC6
Much of my disappointment in the sounds I got from the Schoeps were due not to the mic but to the limiter in the 788t. I hadn't set it to go superfast, and the action on the limiter hurt what I had going. In the end I should just pad that mic anyway.

4) shoot the 416 from the right instead of over the shoulder
As a mech mic I put that one in entirely the wrong spot. I liked what I got from it, but I think I left the shell ejects a little uncovered, and I think moving the position of the 416 would remedy that.

5) more verb mics!
NT5s in ORTF should probably be even further away and probably aimed 180 degrees away. more omni mics and further away. roll a D50 out somewhere. verb verb verb!


6) impact and debris mics

I would have loved to have a couple of mics on the tree that the guys were targeting for impact and debris sounds. That will happen next time for sure.


-----------------

Thats my story and I'm sticking to it. Lots of lessons learned, still got some pretty good recordings, and now I'm amped up for the next one.

Tuesday, June 7

west texas gun recording pt 2-recording day

In part 1 of this little series I went over the background and prep, and in this part I'll go over how the day of the record went.

The day before the shoot I had tested and packed everything up, and I drove to Lubbock on a Saturday morning. It's about a 5 hour drive from DFW, and after leaving at 8:30 am, I arrived at my destination around 1:30, with sunset due at 8:15 pm. When I met up with my gun-toting friends I was informed that the site that we had so carefully scouted was in the process of being bulldozed.

crap.

Time for plan B, and we had to scramble. We had access to a hunting lease about an hour outside of town, but it was relatively unscouted. It was a couple hundred acres of dry plains wilderness. With no alternatives we loaded up and headed out. Upon arrival we found another group of people out on the lease, camping and chilling out. We informed them of our intent and started scouting.

Scouting mostly consisted of me walking around and clapping. Most of the lease was pretty flat sounding, but I eventually landed in the spot you see in the photos and video. This was the most heavily wooded area, and really the only place with any notable echo at all, which was the primary thing I was looking for.

With our location set, I went about setting up the mics while the boys prepped the weapons. It was closing in on 6pm at this point.

My setup was:

-COS11 lav on the shooter
-Senn421 and Schoeps CMC6Mk4 for punch
-Rode Nt5 pair and AT4050 pair for verb
-I fried my Sony D50 the week before, so I brought a Zoom H4n for more verb

pix!

NT5s in ORTF


Schoeps CMC6 MK41


AT 4050s distant


Senn 421


Senn 416


Setup ran until about 6:30 pm, which meant I was going to lose daylight fast. I had the lav on a lanyard, which we used to quickly change out between the guys shooting and I told them all that priority was variety. I had each shooter try to vary his angle and target, and after one clip or so I was moving on to the next gun.

After the first test shoot I realized that one of my Nt5s was not passing signal. I did a quick look to make sure that my cable was connected and my channel was set properly, but after nothing obvioius reared its head I had to make the call to just roll with the one mic and get what I could get given the time that I had available. If we had gotten there an hour earlier I would have stopped it all down to troubleshoot, but I didn't feel I had the luxury of time. After the fact I discovered that the mic/line switch on the mixer had settled into a halfway point that killed the channel, so while it would have been an easy fix with a little more time I felt like I had to make a call and roll with it. I'm still not sure if that was the right call or not given what the issue ended up being.

On top of setting and monitoring everything I was also having to shoot the vid with the iphone, since the other guys were spending all of their time prepping and loading guns.

Here's the mic comparison of the different perspectives on a couple of different guns:

west texas gun shoot-mic comparisons from rene coronado on Vimeo.


After we had exhausted our weaponry, the other people at the lease pulled up in their 4-wheelers and offered to let my guys shoot the guns that they had on them as well. This netted us a .357 magnum and a 9mm high point rifle that we wouldn't have gotten otherwise, so that ended up being a really nice thing from what could have been a crappy situation.

As we were packing up, I went to the H4n and facepalmed as I looked and saw that it was set on line input mode and had recorded nothing. I really needed an intern out on this thing.

All in all, we shot 12 guns in about an hour and were packed up and heading out as dusk set in at 8:15.

Here's a comp of all of the guns we shot:

West Texas Gun Shoot 2011 from rene coronado on Vimeo.


In part 3 I'll discuss some of the things that I'd do differently and reiterate some of the things that really worked well.

Wednesday, June 1

west texas gun recording pt 1-prep


So a little while back I packed up the mics and headed out west to record some gunfire with my friends. Not because I had a project that required it or anything, but just because they have lots of guns and I have lots of mics. Also, weapon recording is one of those techniques that requires experience and iteration, so any opportunity to do this type of recording is to be seized upon.

What I'd like to outline here is my prep process, experiences, and things that I would do differently.

Background

I have done gun records before, but have not really come back with the results I thought I could. My previous experience came from carbon copying Charles Mayne's setup as described on Gamasutra. From that article:

Channels 1/2
Start with a stereo pair of dynamic mics basically arranged in an equilateral triangle from the weapon, with the two mics in front, and pointing to the weapons muzzle. Try to have about a 8- to 12-foot distance here, but it may vary further depending on the gun itself.

Channels 3/4
A second stereo pair condenser mics in an x/y pattern. Try putting about 10 to 12 feet behind the weapon. These are elevated also to about 7 feet. Do some test firing, sometimes you will shift the whole setup and sometimes change the directions the mics are pointing for a better sound.

Channels 5/6
Again a stereo pair, this time a Crown SASS stereo PZM mic. Place the mic setup about 30 feet behind the weapon. This mic captures a very nice low end from most weapons

Channels 7/8
Start with a shotgun mic set up on the right side of the weapon, just over the shoulder of the shooter. For the second channel, a Lavaliere can be attached to the weapon or the person shooting the weapon


While my results from that setup were very usable and interesting, they weren't amazing, and that's mainly due to a series of mistakes I made due to inexperience at the time. We do this in order to learn.

I learned how much I didn't use the SM57s that I had in XY, and how much I really did use the COS-11 lav mic. I learned that Sennheiser MKH series mics don't respond to really loud sounds very well.

But mostly I learned just how important location is.

Location

Guns make lots of noise. The initial attack of a weapon firing is often only fractions of a second long. The vast majority of what you're listening to in any given gun recording in a film or game context is how that initial contained explosion sounds as it echoes out through the space it's in. This means that location is one of the most critical things you're dealing with on a gun shoot. Ideally you want a location that has lots of interesting reflections and is also free of traffic and insect noise. This is much easier to say than to find. Remote private canyon-like areas are really the best bets, at least in this part of the country.

The location for my first and uninteresting gun shoot was very flat and non-reflective. It looked like it would sound good, so we went with it, but in the end it really didn't. Out in the middle of the plains and facing one sand berm, it was difficult to really get any good reflections going. I had failed to understand the degree to which location would influence my sounds, and I paid for it.

For this gun shoot I was determined to not fall victim to that again. I had one of my friends scout a private gun range north of town that was a custom built range with 12 foot sand dunes that were making great reflections and verbs.

Gear

My philosophy here was to break the sound of a gunshot into three parts and then retro fit my gear choices around what I figured to be the best way to record those parts.

- Punch -

My punch mics were going to generally be a medium distance from the weapon and aimed at it from in front. I went with a Senn 421 and a Schoeps CMC6 MK41. Mono makes the most sense for punch IMO, so I didn't bother with a dynamic XY setup.

- Mech -

For mech I needed to isolate the mechanical movements of the weapons fired while excluding the explosions and verb to the best of my abilities. Mech also makes sense in mono, so there are no stereo elements here either. I learned on the first shoot how amazing the (wired) COS11 lav sounds for mech, so I went with that and with the Senn 416, which I would aim from behind and over the shoulder. In retrospect I think I should have used the 416 to come at the weapon from the shell eject side at about a 90 degree angle.

- Verb -

The key element, and I wanted to spend as many channels as needed to on this. I decided to bring a stereo pair of AT4050s in omni that I would place a hundred yards or so downrange. The 4050s are great workhorse large diaphragm mics that are quiet and clean sounding, so I figured they'd be prime candidates for verb recordings. I also would bring my rode NT5s set up in ORTF and place them behind the shooter. Additionally I'd bring my Sony PCM D50 and run the internal mics on that.

For recorders I ran with a sound devices 788t for all of the close up mics, a Tascam HDP2 for the distant 4050s, and the sony as a standalone unit.

I also shot video of everything on my iphone.

In part 2 I'll discuss what happend on the day of the shoot.

Tuesday, April 26

Conducting shootouts-part 2 mic shootouts

In my previous post I talked about the overriding philosophies I employ when doing gear shootouts. In this post I'd like to address microphone shootouts specifically.

Not all mics are the same and not all mic shootouts should be the same, but what I'm going to do here is outline some specific guidelines that I'll employ in a future shootout and that others can use to do their own shootout and listening tests.

------

I'd like to lead off by offering what is probably going to be the most controversial recommendation I'll make here - to prefer the exact same performance over the exact same signal path.

What I mean by this is that if you have multiple channels on a mixer that are all rated within tight tolerances of one another (as in a sound devices 442 or 552) then the difference between cables and preamps will not add up to a greater difference than if you run multiple performances in front of the mics through the exact same cable and pre. This is especially true with tests that involve the human voice, and less true with mechanical or speaker produced sounds.

So given that I'm going to recommend (and use) a methodology that uses multiple cables and preamps simultaneously in order to capture the exact same performance in front of the mics.

The other possibly controversial thing I'm going to advocate is calibration of the mics based on output level and not input level. This would have the effect of not measuring mic sensitivity against one another for the purposes of better evaluation of tone. As most audio people know, the way we hear tonality varies pretty dramatically depending on the spl we're listening to, so the question is this: is it more important to hear the differences in tone or sensitivity between mics? My answer is tone, and that's how I'm setting up my tests.

My evaluations will look to pit mics against one another in the following areas:

- price
- features
- self noise
- transient response
- off axis respnose
- on axis human voice
- on axis sfx

----------

Lets begin with setup:

Whether you're testing one mic or several, you'll want to keep the signal path as short and stable as possible. This will be my setup for some upcoming tests:

- bypass all switches in the mics. Highpasses and pads specifically should be disengaged
- place the mics as close to each other as possible, and at the point of an equilateral triangle relating to the speakers in your room.
- run the shortest reasonable cables to consecutive channels on a sound devices mixer
- bypass all signal changes on the mixer. Highpasses, pads,limiters, stereo links, etc all disengaged
- set faders to unity
- run direct out prefader to the recorder (a 744t or 788t)
- bypass all signal changers on the recorder. Again, highpasses, pads, eqs, limiters, all disengaged.
- set recorder to 24 bits 96kHz

In some cases I may skip the mixer entirely and just run straight into the recorder. The 788t has 4 xlr inputs, so if I'm testing 4 or fewer mics and have that recorder available to me at the time I'll run the tests directly to it. In all other cases I'll be using the mixer almost purely as a preamp and nothing else.

This is pretty similar to most industry standard setups for field recording and production recording, so I think the end results should translate very cleanly into the real world.

-----------

On to calibration of the mics:

The most simplistic way to calibrate a mic input is to simply mark a level on a preamp and roll with that. I prefer to to with a slightly more complex route - pink noise and dbspl.

When choosing level to calibrate to, one must consider what's going to be tested, and in the case of many microphones you're talking about the human voice, musical instruments, and sfx recordings. The level chosen will dictate both headroom and noise floor, so doing this too wrong can mess up the tests pretty badly.

For my tests I'm going to calibrate to 90db SPL = -12dbfs.

The primary reason for this is to give myself ample headroom for transient response tests (I should be able to get to 102dbspl before clipping the A/D) and to better utilize the full 24bits of headroom.

Steps to calibration should go as follows:

- send pink noise through the speakers
- measure the volume that measures 90dbspl C weighted at the microphone position with an spl meter
- adjust the preamps until the recorder's digital meters show consistent peaks at -12db spl

---------

setting it all up and calibrating it can often take as long or longer than actually running the tests. double checking to make sure it's all perfect is key to not running tests that will be at best misleading and and worst completely useless.

---------

With the mics calibrated and positioned, it's time to run some tests.

First I'll just roll on the calibrated pink noise.

next I'll turn everything off and run very quiet room tone.

third I'll speak into the mics. I'll tend to just describe what I'm doing and what the setup is as a test. This leaves me at a natural speaking voice and cadence. All voice tests will be done about 2 feet from the mics.

The fourth test is to move to 45 degrees off axis and speak again. here I'll just say that I'm speaking 45 degrees off axis.

Next is perpendicular, using the same language and distance.

with voice done I'll move on to transient and harmonic response. I have a set of small tingsha bells that I'll use, but generally you can use any type of ringy metal to do a similar test. First, from about 2 feet away I'll strike the bell on axis and let it ring out.

next I"ll do a rotation where I strike the bell 90 degrees off axis, and while its ringing I'll slowly move it to on axis. Once the bell is on axis I'll strike it again, then slowly move it to 90 degrees off axis on the other side of the mics. Once in position I'll strike it one last time and let it ring out in that position.

Next is a guitar chord (I like G) Guitar chords show off how the mics handle midrage frequencies amongst other things. This one is just done on axis.

last test is to grab a bag and record some foley. Bags are fun because they have a fair amount of complex cloth and clasp sounds that can cover a lot of frequency and dynamic range in a pleasing and complex way.

--------

With the recordings done, I prep the presentation. Presentation consists putting a chart together comparing all of the pertinent info: price, switches, other features. Mics are pretty straightforward, so this chart isn't usually too much of a burden.

I'll then edit all of the audio at native resolution in a way that best pits the mics against one another. 2 to 5 seconds clips of each mic test in a consistent order placed back to back to back in a single file - one file per test. This will yield about 9 files. Spectrograms of the pink noise can also be useful.

That's a pretty thorough test. Even more can be done though, (like testing handling noise and proximity effect) but really too many tests can cause analysis paralysis. This is probably plenty.
Saturday, April 16

Conducting shootouts-part 1 Philosophy

I’m going to do a couple of posts here about conducting gear shootouts. In this first installment I’ll discuss the purpose and philosophy of shootouts that I personally subscribe to, and in the second I’ll go over doing mic shootouts specifically.


So generally, why do a shootout?


I do these to clearly define the strengths and weaknesses of one piece of gear vs another in order to make buying and session decisions. I personally took a lot of inspiration from the zacuto great dslr shootouts conducted last year, and you’ll see the principles that they applied in those tests echoed in my own.


With that in mind, what are the main things that need to be dealt with when conducting a shootout?


Here’s my list:


  • The gear needs to be tested fairly against one another.


  • The gear needs to be tested in situations that approximate common and specific real world conditions.


  • The gear needs to be stress tested.


So fundamentally here’s how I go about covering those three main points:


Testing fairly:


Testing apples to apples isn’t always possible in the purest sense of the word because manufacturers will do different things with the gear in order to differentiate themselves, but the objective should be to get as close to that reality as you can.


Generally testing fairly means:


  • Setting up all devices in a manner that is as close to equal as possible
    • this means setting all filters, sample rates, bit depths, and other things to the same settings and otherwise bypassing anything proprietary to a single device if possible.
  • calibrating all devices to the same baseline
    • I’ll go over calibration in more detail later, but generally you want to lock down a baseline testing level for any signal that’s going to pass through the devices being tested in advance of the tests. Pink noise and db spl meters are your friends here.
  • removing or reducing all outside influences on the test
    • Outside influences are the things that are required to be in the test in order for the test to happen, but that aren’t being tested themselves. This can be things like the sounds that are being recorded in order to test, the mics, cables and recording devices and preamps and rooms etc that are part of a recording signal chain that are both part of the recrording chain and not part of the equipment being tested.


Testing situations that approximate specific real world situations


Tests are not useful unless they can give information that will illustrate how gear works in the situations you’re most likely to use them. This means that testing an akg D112 as a distant mic on a woodwind section (while potentially interesting) is not particularly useful.


A whole lot of recording gear is tuned up to record the human voice, so generally voice recording is a good baseline for a wide variety of gear. Shootouts can either be wide and shallow or narrow and deep, but not often both wide and deep. Find the appropriate balance there and choose your subject matter accordingly.


As an example, in my handheld recorder shootout I focused on a few handheld recorders that I had available to me. But beyond that I consciously tested their performances using the internal mics only, and I tested them in the context of sound effects recording. I could have tested the preamps separately with external mics, and I could have tested them in other contexts like interviews or musical performance recording, but I wanted my tests to be focused on how these devices perform as impromptu sfx capture devices specifically so I tailored my tests to that specific end.


Think about your scope before doing the tests, then work that scope thoroughly.


Stress Testing


With a scope defined, the next step is to really test the boundaries of what the gear does within that scope. That means if you’re testing a recording device you’ll do things like peg its limiters to see how they react, roll quiet room tone to see what happens down on the bottom end, and otherwise put the gear in a variety of tough recording situations. Microphones can be stress tested similarly, but can also have things like off-axis response, transient response, and proximity effect really run through the ringer.


Stress testing gear is important because a fair amount of what differentiates one piece of gear from another is how it handles extreme situations. The better a piece of gear is designed, the more gracefully it will deal with what you can throw at it. Its often a combination of price and extreme end performance that determines one’s buying and usage decisions.


A note on calibration:


Calibration is a little more complex than just setting everything at the same place. It requires thought into what you’re about to record.


Calibration is usually done by sending tone or pink noise through the devices and setting inputs to a level that is consistent across all devices. In the case of my HH shootout I sent pink noise through at 70db spl and adjusted the pre on each to -12dbfps. This meant that at about 92db I was going to clip, which was a pretty hot setting. That setting was done on purpose because my intent was to both test the limiters on the devices and to test the room tone.


The level at which you calibrate for the test has a big influence on how those tests come out, so choose your calibration (and headroom) level carefully.


Presentation:


One of the things that I really liked about the Zacuto presentation that I tried to incorporate into my own shootout was the presentation.


Specifically, I loved the quick edits from one camera to the next of the exact same footage. I really felt that gave me the best opportunity to make a blink assessment of what I was seeing. In my tests I modeled my edits the same way, and really put the devices right next to each other in the presentation. If I had put each test in its own soundcloud player, the reader (listener) would not really get to make a split-second evaluation, and prejudice with regards to brands and price points would have an opportunity to creep in.


I also did my best to document and describe every step of the test so that the reader could listen to them with a clear sense of what they’re actually hearing. This included descriptions and photos of the setups, tables describing features and functions of the devices, and wraps ups with my own personal impressions and thoughts.


So that’s the philosophy and general theory behind how I run my shootouts. In the future I’ll do a mic shootout and get into some details about how to do mic shootouts specifically.

Wednesday, April 6

On art

On Art:

A while back I stopped thinking of myself as a technician and started thinking of myself as an artist. This came around the point at which I had gotten enough of a handle on my techniques as to feel the overwhelming need to do something personal and creative with them.

As time wore on and I had conversations with my incredibly artistic wife I started to turn over in my mind the question of what exactly art is, and how I can get better at it.

What I came up with was this:


This post will discuss why I define art this way and why it matters to me. All of the content here is my own, and was not copied or borrowed from anyone else. Feel free to read this as my opinion on the matter, but don’t read much more into it than that.

So put simply:

Art is creativity expressed through technical means.

The reason I love this definition so much is because of both what it allows in and what it excludes.

I’ll start at the beginning.
-----------------

Art requires creativity.

Creativity is as it sounds. It is the creation of something new. If there is no creativity then there is only repetition of things before, and rote repetition is not art. A mass manufactured bottle churned out by a machine is as much not art as the original design for the first one is. Plagiarism is also not art unless it required creativity beyond what the original creator did in order to replicate it exactly.

Art requires a medium.

Art requires translation from one individual to others in order to exist. It needs a medium. Without a medium you don’t have art, you only have a dream. Dreams and thoughts are important, but alone they don’t constitute art.

A medium can consist of anything from words to paint to physical movement to sounds to ones and zeroes. The only concrete requirement for a medium is that it be observable by others. Some art exists in multiple mediums simultaneously, but all art requires at least one medium in order to exist as an actual work.

Manipulation of mediums requires technique.

There is a craft that comes before the art can arise. Whether in sounds or images or piles of dirt or pencil and paper, the prospective artist begins the artistic journey as a technician. The more refined the artists technique in manipulating the medium, the more fully and truly the creative ideas can be expressed through that medium to others. The less refined the technique, the more frustrated the artist.

-------------------

So what?

Well, if I now consider myself an artist I need to be able to evaluate the art of those around me as well as to do the things that will make me a better artist tomorrow than I am today.

Now that I have in my head what I believe to be the building blocks of art, I can begin to pursue some specific things that will make the art that I do better and at a faster rate than those who don’t think about these things.

I naturally gravitate towards the technique side of the artistic equation, and by recognizing that in myself I can do things like force some creative endeavors here and there, and also measure myself objectively against the technical achievements of my peers.

I also just enjoy art generally, so now that I have it defined more clearly in my head I feel like I’m able to look at things like computer programs and paintings and guitar performances and every part of a film (acting, makeup, dialogue, set dressing, lighting, cinematography, foley, sound design, mix, location, coloring, etc) and say “Man, that’s really great art” and know what I really mean by it.

So there it is, my definition of art. I like it and I’m sticking by it. In the future I may discuss the way I measure high art vs low art.